Ashampoo Photo Optimizer 8 Review
Features - 91%
Usability - 97%
Security - 100%
Support - 90%
Pricing - 91%
94%
Very Good
Ashampoo Photo Optimizer 8 helps bring professional level photo editing to everyone thanks to its clean, simple interface and intelligent yet easy to use automatic optimisation tools
Ashampoo Photo Optimizer 8 is a photo editing suite with an emphasis on providing a great set of photo editing features whilst still remaining very quick and easy to use. This aim is achieved, in part, thanks to the excellent auto optimisation tools available in the latest version and as such provides great value to both beginners and image editing pros alike.
Version 8 sees many small improvements over the previous version, both the photo editing functionality itself has been upgraded alongside improvements in how the application performs overall, these both make for a welcome upgrade which runs more smoothly and feels nicer to work with than with previous versions.
With a very real need for easy to use, quick and yet still powerful image editing software growing all of the time, I am looking forwards to see what Ashampoo Photo Optimizer 8 can do, lets go try it out!
Are you looking for help and advice on choosing the best backup software for your PC or Mac? If so then be sure to check out our guide to choosing backup software which also contains a list of our favorite choices as tested here on BestBackupReviews.com!
Key Features
- Well designed, clean, simple and easy to use interface
- Fast photo optimisation, thanks to excellent auto-optimisation tools
- Easy to navigate photos and ability to make auto-backups of originals
- Great selection of image editing tools
- Ability to watermark or easily add text to images
- Great portrait optimisation tools (remove red-eye, whiten teeth etc.)
- Great set of filters and effects (Gray scale, Oil paint, Blue-shift optimisation etc.)
- Easy to use batch processing tools (these are very good)
- Improved 64bit and RAM support for a more stable user experience
- Very cost effective compared to alternative image editing suites
Photo Optimizer 8 Usability
Installing Photo Optimizer 8
As with all Ashampoo software installing Photo Optimizer 8 was both quick and easy and I had the application running within just a couple of minutes. At just over 100MB the download is also very reasonably sized for such a feature packed application meaning the initial download is also very easy to complete.
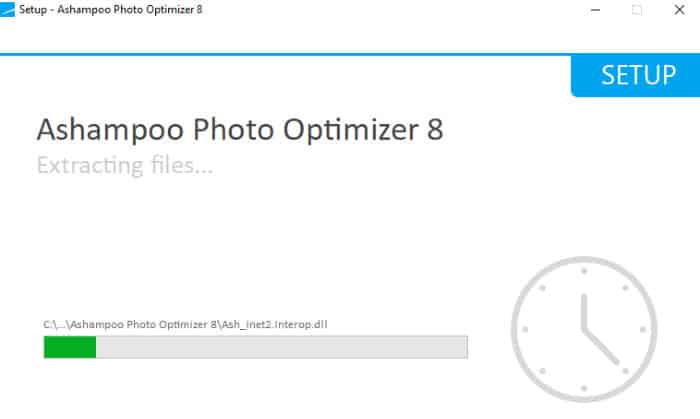
Once downloaded and set running the Ashampoo installer will take care of most of the work for you, the option is there to install in a different location to the default should you so wish but if you like to stay with the default setting this really is a painless process. Once installed a restart will be requested by the application to complete the install.
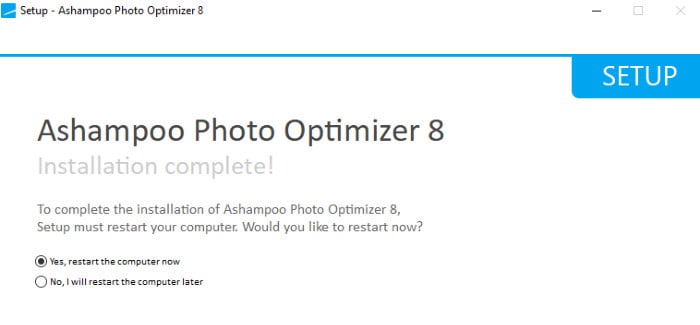
After the restart has completed the software will be fully installed and ready to use, upon first opening the software you will be asked to enter a licence code or select to evaluate the software over a period of 10 days (30 if you decide to register with Ashampoo).
Finally, with the registration out of the way the software will begin by greeting you with a prompt asking you to start by dragging and dropping in a photo to be worked on or to select a folder containing multiple images to work on.
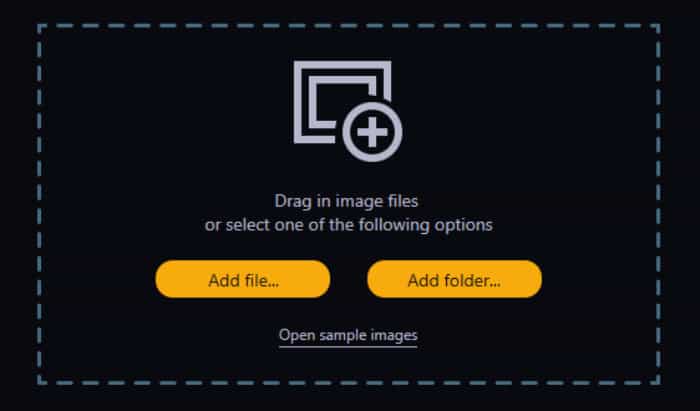
Photo Optimizer 8 Interface
The user interface is an important consideration when choosing a photo editing tool, this essentially is the measure of how quick and easy you can find the features you need and make any necessary adjustments to your photos.
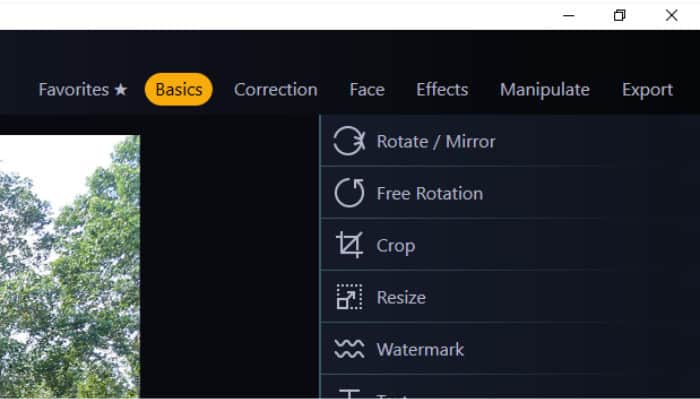
Personally, after testing the application over several days I actually quite like the interface Ashampoo has built. The main toolbox of tools can be found on the right of the screen with a menu just above used for categorising these tools and making the one you need easy to find (as is shown above).
Once in the required toolbox clicking on any of the tools / effects will cause that tool (in most cases) to automatically create a preview of what it does to the currently selected image. this effect is not permanent at this stage and can easily be removed by clicking on the same tool / feature heading again or permanently applied to the image by clicking “apply” which is next to each tool.
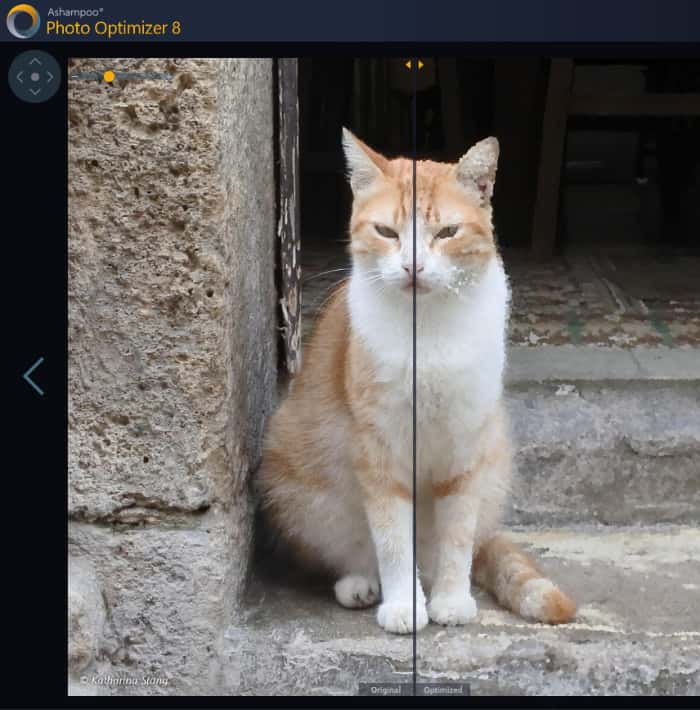
Once an effect has been applied to an image for preview (before being permanently applied) Photo Optimizer offers a fantastic “slider” tool which allows you to easily compare the original version and the new version with the provisional optimisation. Simply slide the slider across to see more or less of the preview like below.
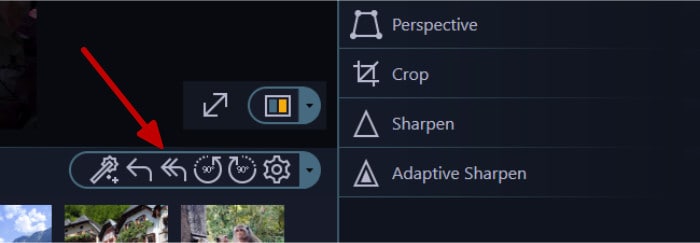
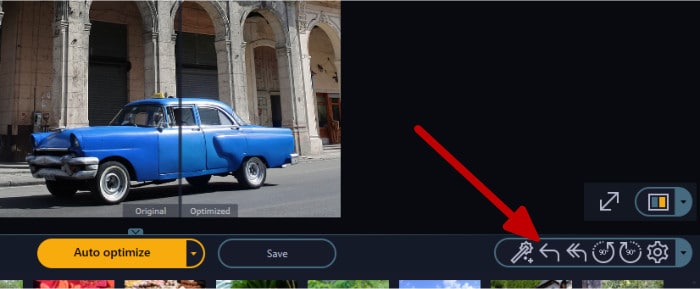
Moving down to the bottom part of the screen we find another toolbar just below the main image panel itself. This “quick access” toolbar can be customised to hold you most commonly accessed tools and functionality but by default will house the undo, undo all, rotate and optimise all feature shortcuts.
Finally, whilst hidden away by default, we can see all photos in the currently selected folder in a gallery view by clicking on the expand button found at the bottom right of the main image panel.
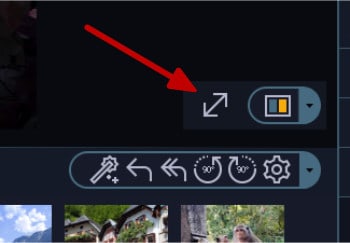
Once clicked this will auto expand the image gallery preview of all images in current folder (this can also be seen by shrinking the main image panel manually should you wish to keep this gallery view permanently in sight).
Application Settings
There is not too much to mention about the overall application settings, especially given that most of the editing tools and features within the application have their own mini-settings menu available whilst they are in use.
The general settings page can be opened from the settings menu found at the top of the screen, from this page we can set all of the options affecting the application as a whole.
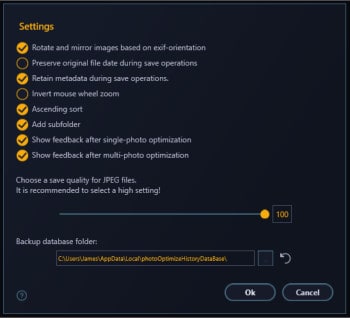
A couple of important settings to take notice of here are the image quality slider level and the option to preserve the original image file during a save of a new version.
The image quality slider determines the level of detail any edited image will be saved with (the higher the number the more quality retained in the final saved image). It is advisable to keep this high unless needed, for example, under certain use cases such as saving images which will be shared over the internet (which should be made with smaller file sizes) or in cases where low disk space is an issue this can be set to a lower number.
The option to preserve the original image should also be (in my opinion) turned on so as to make sure you can always start again with your original image if needed. This feature is turned off by default so be sure to turn it on as it could be an important tool, especially if you don’t have a good backup strategy in place!
Auto Image Optimisation
One of the most appealing reasons for using Photo Optimizer is for the suite of auto optimisation tools on offer. This collection of tools makes auto-adjusting elements of a photo such as light levels, contrast, sharpness, noise (plus a few other things) very quick and easy. In-fact, a total of 7 fully automatic optimisation tools combine to make auto optimisation a key feature of the application, this means that those less familiar with photo editing have a great way to get their photos looking great.
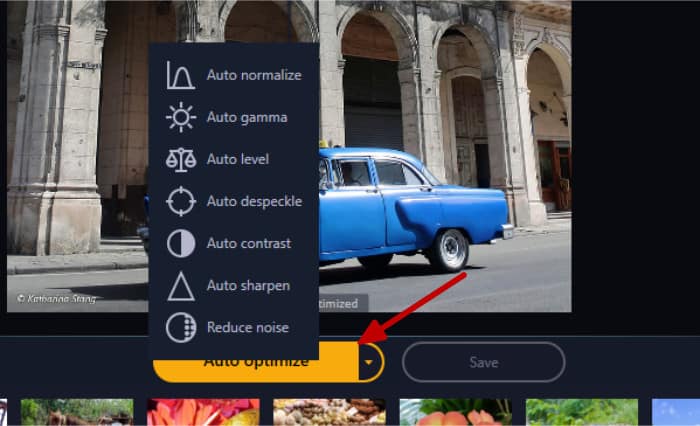
One of the most useful auto optimisation tools is the Auto Level tool which will automatically adjust the light and colour levels for a photo, often, this tool alone provides all that is needed to get photos looking at their best with just the simple click of a mouse!
Other automatic tools such as Auto Contrast, Auto Sharpen and Reduce Noise can be useful when dealing with pictures taken in low light conditions or where a moving object is not quite in clear focus.
As was mentioned before, when using any of these tools a preview can be seen alongside the original image using the slider tool, should you change you mind it is as simple as clicking the undo button (on the bottom toolbar below the image) to easily remove the effect again.
Staying with the automatic features of Photo Optimizer 8, another great feature is that of batch optimization. To start using batch optimisation simply expand the gallery panel and select 2 or more images to apply effects to simultaneously.
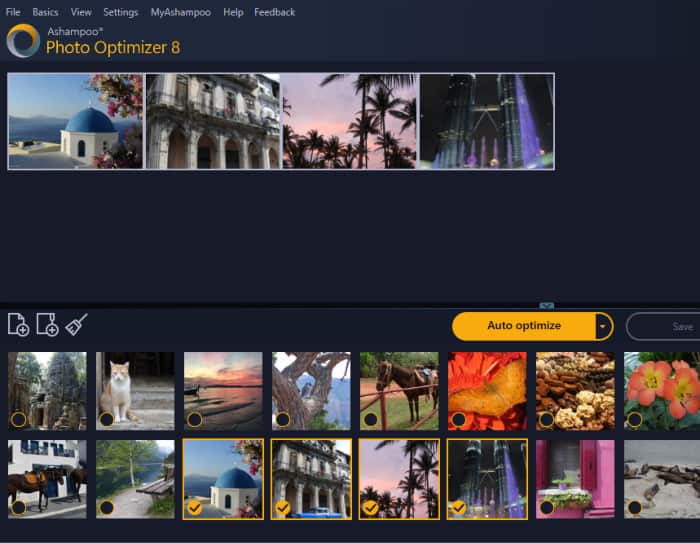
As is shown above I have 4 images selected form my gallery meaning when I perform an action (such as auto optimising the contrast) this effect will also be applied to all other selected images automatically!
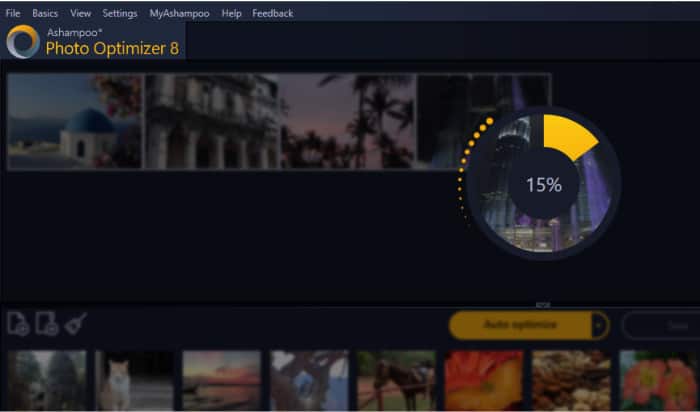
This batch processing tool can also be activated whilst working on any single image using the batch tool found in the bottom toolbar menu:
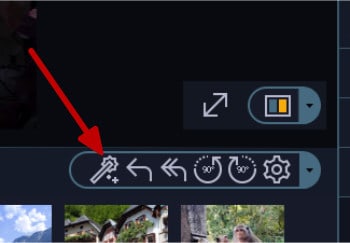
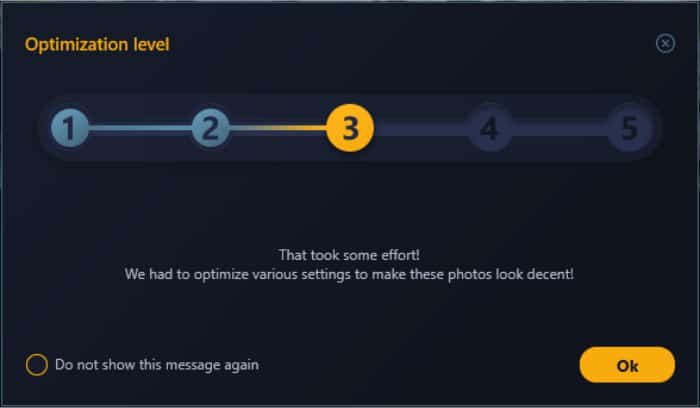
When used in this way any adjustments made to the single image being worked on will then be automatically applied to all other images found in the same folder (you will be asked to confirm first). Once the work has completed Photo Optimizer will show a summary screen detailing how much optimisation work was needed to re-work the batch (this can be turned off in general setting should you wish).
In my opinion this batch processing tool is a great feature for any photo editing tool and it is great to see Ashampoo have set this up in a very easy to use and effective way. This batch optimisation functionality is great for easily optimising large batches of photos, even for those who are very new to photo editing which is a real plus point for this application!
Manual Image Adjustments
So far in this review I have mainly looked at the automatic optimisation tools, how to use them on individual images and how to apply such effects across a batch of photos simultaneously. Whilst these auto optimisation tools are great and produce very high quality images with the minimal of fuss, there will be times in which manual adjustments are still needed.
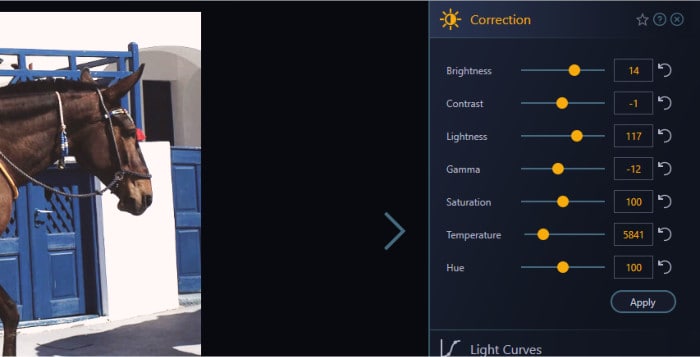
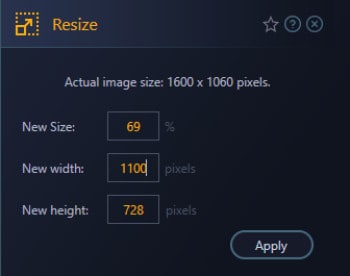
Manual adjustment tools (as are shown above) not only provide more detailed levels of adjustments for our images but also allow other work to be performed, this includes any work involves the human eye such as cropping and straightening of horizons.
Cropping:
The crop tool allows a certain section of a photo to be “cut out” from the rest of the photo. This is a fairly standard tool, however, Photo Optimizer makes this an easy process and even provides a range of pre-set aspect ratios which might be useful when working with certain sizes of screen or printing paper.

Brightness Correction:
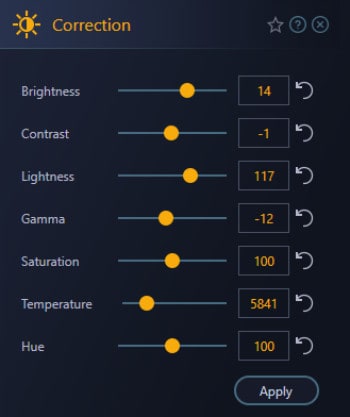
Manual brightness correction gives you full control over the light levels of a photo, ideal when working with photos which are naturally darker or lighter than they should be.
Straighten Horizon:
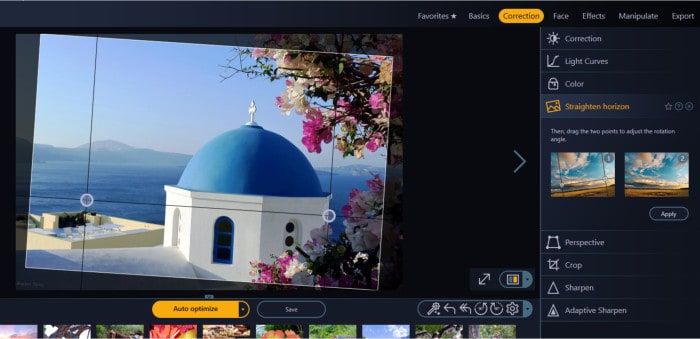
Another very useful tool, especially for those taking photos of landscapes and other outdoor sceneries is the “Straighten Horizon” tool. This tool allows photos which, for whatever reason, have a non-horizontal horizon to be adjusted so as the horizon appears straight.
Other Selected Tools:
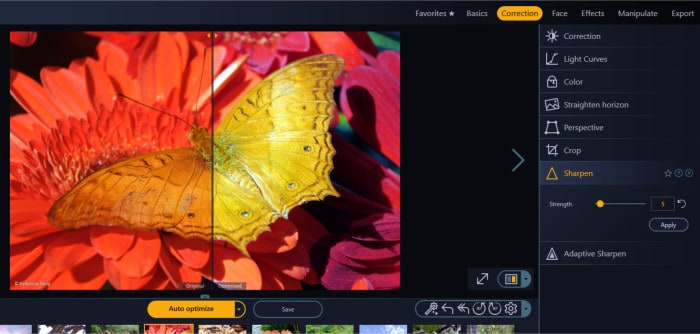
The manual sharpening tool allows users to specify the level of sharpness which will be applied to the image, this is great when working with close up, detailed shots as can be seen below.
Finally, these are just a few of the manual adjustment options available in Photo Optimizer 8, I wont go over all of them in this review (there are loads of them) but hopefully this section shows that these tools are indeed there and make it easy for users to control the exact impact each tool will have on their photo as and when is needed.
Photo Effects and Filters
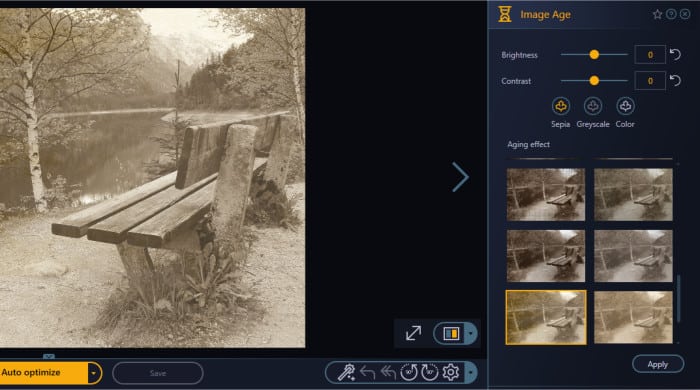
In addition to the manual adjustment tools (above) there are also plenty of photo filters and pre-made effects included with Photo Optimizer 8. For example, pre-made overlays can easily be applied to images in addition to multiple other effects such as those required for artificially ageing a photo to make it look much older than it really is.
Other, really useful, effects can also be easily added such as creating a professional looking watermark, great if you are planning on sharing or using any of your work commercially.

And finally, some other “portrait” related tools allow for removal of red-eye from photos of people and (when applicable) the whitening of teeth.
These are just a few examples of the effects and filters available within Photo Optimizer 8, there are literally hundreds of options available and with a little time invested you should be able to get almost any photo effect you require from such software!
Photo Optimizer Security
There isn’t a lot to say about security in this instance and it is not really applicable to this review.
Ashampoo Support
Ashampoo have a great website and provide a comprehensive Q&A section which handles most problems you might encounter. Should you still need to get in touch with a support representative you can submit support tickets online.
Photo Optimizer 8 Pricing
Ashampoo Photo Optimizer 8 is priced at $39.99 – this is a one-off licence fee!
Be sure to also check out Ashampoo’s deals page as they regularly have great deals across their entire range of software (including Photo Optimizer 8).
Photo Optimizer 8 Review Summary
Ashampoo Photo Optimizer 8 helps bring professional level photo editing to everyone thanks to its intelligent yet easy to use automatic optimisation tools. Ease of use is clearly a big selling point here and Ashampoo have done a great job in making a very powerful editing suite with an easy to navigate interface.
Whilst I think it would be fair to say this application is aimed more towards amateur photographers than professionals, it would also be fair to say that the results I produced during my testing were very impressive and an easy to use tool with a streamlined interface does not necessarily mean a product that is lacking substance!
Sure, having said all all of this, this tool wont compete with the likes of Adobe Photoshop on features any time soon, but then again, the vast majority of photographers don’t necessarily want their photo editing tools to mirror Photoshop. Many photographers would much rather have a time and cost effective tool which will just get the job done, to a high standard and with the minimal of time and fuss. It is to this majority that Photo Optimizer 8 has clearly been aimed and in turn delivers fantastic value to with its simple one-off licencing cost of just $39.99.
All-in-all, a great photo editing tool and a great addition to any photographers PC, well done Ashampoo!
Are you looking for help and advice on choosing the best backup software for your PC or Mac? If so then be sure to check out our guide to choosing backup software which also contains a list of our favorite choices as tested here on BestBackupReviews.com!

