Cyberduck Review
Features - 85%
Usability - 89%
Security - 92%
Support - 85%
Pricing - 99%
90%
Very Good
Cyberduck is 100% free to use and provides a great way of accessing cloud storage targets from a desktop PC! An easy to use interface and Cryptomator integration help make this a very useful utility to have installed
In this Cyberduck review I will be looking at the free and open source cloud storage browser available for both Windows and MacOS users. One of the key features of Cyberduck, aside form been completely free to use, is the wide range of cloud storage options it supports, this includes Amazon S3, Backblaze B2 and cloud favourites including as Dropbox, OneDrive and Google Drive.
Given there is still (relatively) little choice for Windows users who wish to browse their collection of cloud storage accounts and by being completely free to use, Cyberduck naturally becomes a top choice for those seeking such a tool. It is also great to see that the developers have recently integrated the Cryptomator encryption software directly into the Cyberduck application thus making the act of securing and encrypting cloud based files easier than ever, a great move!
So, with all of the above in mind, I am looking forward to trying out Cyberduck for myself, lets see what it can do!
Are you looking for help and advice on choosing the best backup software for your PC or Mac? If so then be sure to check out our guide to choosing backup software which also contains a list of our favorite choices as tested here on BestBackupReviews.com!
Key Features
- Simple and easy to use Windows interface
- Free and open source (donation of $10+ required to remove the donation message)
- Built in zero knowledge encryption (via the Cryptomator integration)
- Desktop client software available for Windows and MacOS (no Linux client as of yet)
- Bookmarking feature allows easy login and access to multiple cloud accounts
- No smartphone apps available (this is desktop only software)
- Great range of cloud service supported (including AWS S3 and Backblaze B2 cloud)
- No tabbed interface (although can open multiple browser windows)
Cyberduck Usability
In this section of my Cyberduck review I will be making use of the software myself and looking at the functionality on offer in more detail. This begins in the next section where I will download the installer and start working with Cyberduck on my own Windows PC!
Downloading and Installing
Cyberduck is free and open source software, as such it can easily be installed via the Cyberduck Downloads Page and at just over 47MB this is a relatively quick and easy download. Once downloaded the installation was impressively quick and easy taking only a few seconds and needing only a couple of clicks of the mouse before being ready to go!
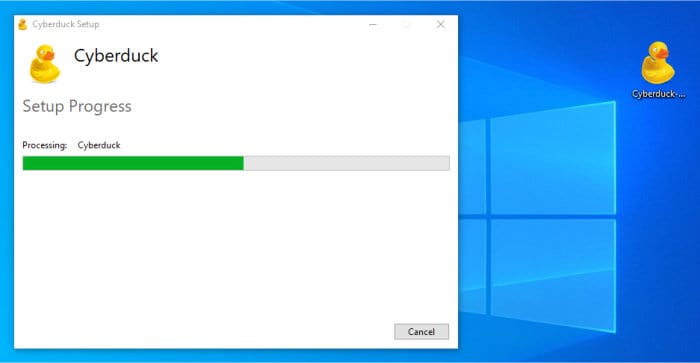
It is also nice to report that at no point during this process was I asked to sign-up for an account or validate my email address and so on. Most free software providers usually want some information from your these days so this was nice to that Cyberduck can be installed without any of this!
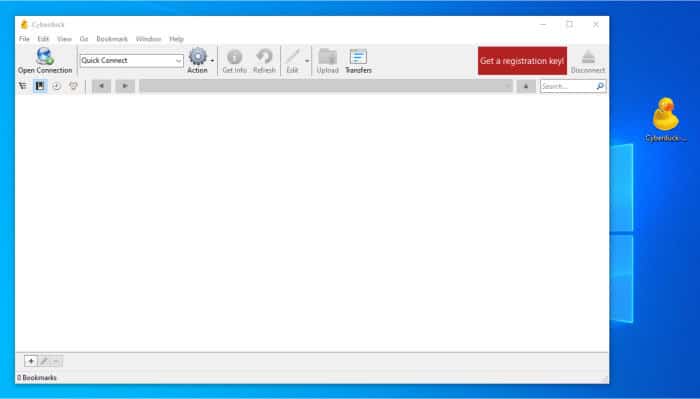
Once the installation has finished we will be immediately be taken to the main browser window (as can be seen above), from here we can start exploring the application further and configuring the first backup storage provider to work within the client!
Cyberduck Windows Interface
Whilst Cyberduck might not have the most slick looking interface in the world it is definitely a very functional and well though design, this approach means accessing all of the main functionality of the application is both quick and simple.
One of the first and most important things most users will be doing with the software is connecting to a cloud storage service, for the purposes of this review I will be connecting to Dropbox. Although I’m using Dropbox in this review it is worth mentioning that Cyberduck support many popular cloud providers including:
- S3
- Azure
- Backblaze B2
- Google Cloud
- Google Drive
- Dropbox
- Microsoft OneDrive
- Files.com
- FTP (Including SFTP)
- WebDAV
- Plus others…
This is an impressive list of providers which is supported however, as mentioned above, I am going to start with Dropbox as this is, for many at least, one of the most popular offerings on the market today.
* If you are looking for a cloud storage provider be sure to also check out some of our many cloud storage reviews right here on BestBackupReviews.com!
I can start by clicking on the easy to find “Open Connection” button on the top left of the main menu, this will open up a box where the service credentials can be specified further.
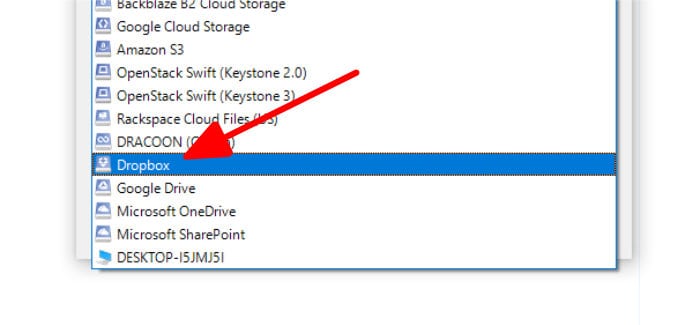
Once inside this box one of the first things to do is specify Dropbox as the service to be used, this involves finding Dropbox in the Drop-down list of providers like so:
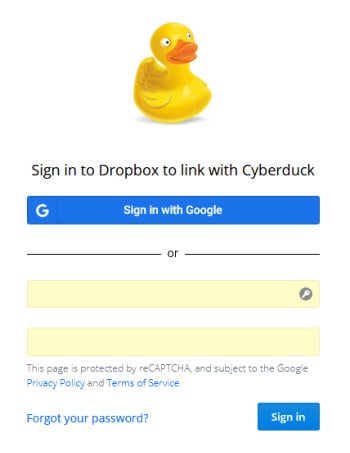
Once Dropbox has been found in the providers list we can optionally specify whether or not to save our login (or authentication) details for future use, hitting the “save password” box will accomplish this should we want to do this. The next step is to click the “connect” button at which point Cyberduck will reach out to the Dropbox OAuth authentication service in a browser tab and ask us to login to our Dropbox account.
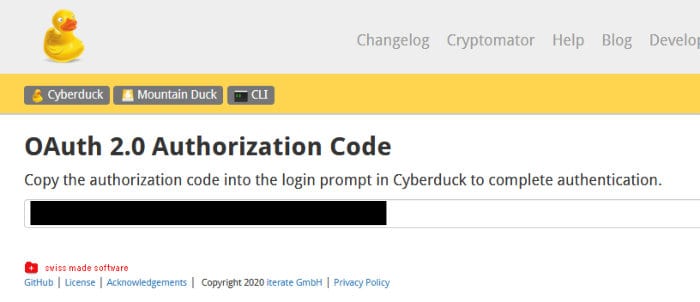
Once authenticated, Dropbox will provide us with a key which we much copy, take back to the Cyberduck application and then paste into the awaiting box. It is important not to share or write down this key, simply copy into the Cyberduck application (which will be awaiting it) and then destroy it (closing down the down the browser should be enough here).
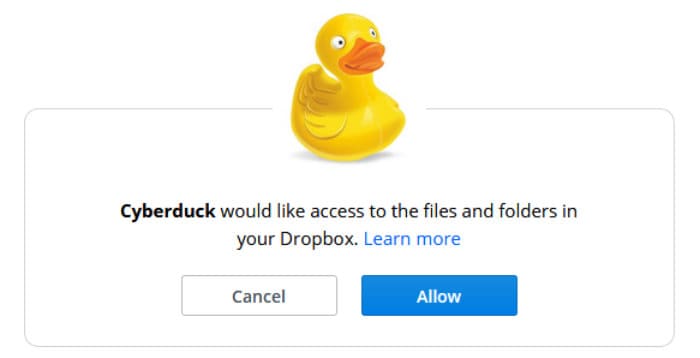
Once the integration is successful we will be able to start using the Cyberduck interface to upload and download files to the Dropbox account. The storage target itself will be shown in the middle pane of the Cyberduck application and is fully co-operative with the Windows system, this means that files can easily be dragged-and-dropped from the Windows host to the cloud drive and visa versa.
Bookmarks within Cyberduck
Once a cloud drive has been integrated into Cyberduck, one of the most important things to do next is to setup a ‘bookmark’ for the service. Bookmarking is important as it allows users the preserve the configuration and authentication details for any given service meaning we can easily re-connect with said service with just a click next time we open up the Cyberduck software (these settings would otherwise be lost).
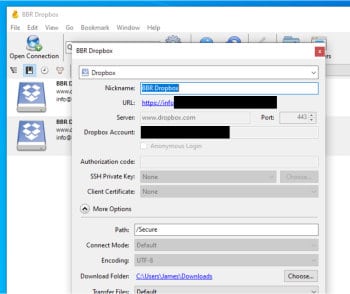
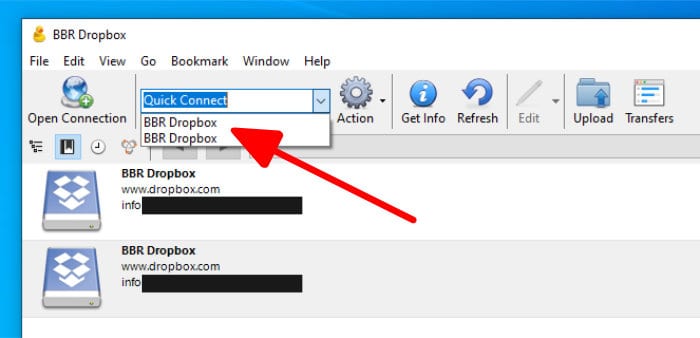
Once the bookmark has been setup it will be easily accessible in the future via the bookmarks drop-down list which is found on the main application toolbar. Simply drop the menu down and click on any bookmark to open up the required cloud service.
Using the Cryptomator Tool
One of the big new features of Cyberduck is its integration with the Cryptomator encryption tool, a tool which makes adding secure, user defined encryption to files and folder on the local PC easy and straight forward.
Cryptomator works with the concept of ‘vaults’, a vault being, in essence, a folder which is encrypted using a password set by the user. To configure a Cryptomator vault first requires a specified folder be right-clicked on and then the “New Encrypted Vault” option be selected (this folder can reside on the local PC or in the cloud drive whilst it is being encrypted!).
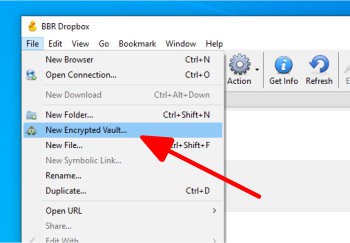
Once in the tool for creating a new vault we can then specify the encryption password for this vault, Cryptomator will indicate how how secure the password is thanks to a password strength bar but crucially offers no way to specify which encryption algorithm is being used.

After the password is set the software will begin encrypting the folder and creating the new vault, you can at this stage click a box allowing the software to remember the password meaning the vault will be automatically opened next time your try and access it via Cyberduck (although interestingly I cant find a way of ‘un-ticking’ this setting post operation, meaning it will always open when the bookmark is clicked?).
Whilst Cryptomator is easy to use due to this integration with Cyberduck and widely regarded as a secure encryption tool in its own right, it does feel like it is missing some functionality. For example, I cant find any way to remove the ‘remember password’ option when creating a vault or any way to otherwise ‘lock’ the vault again after use. Additionally, there are very few application options pertaining to the Cryptomator integration and functionality such as choosing the type and strength of encryption being used is also unavailable.
But with this aside I think it is great to see this tool integrated and it does work well, I also recognise this integration is very new as I write this (being only a few weeks in) so I hope to see this improve over the coming months.
Cyberduck Security
As was covered a little earlier on, Cryptomator has been integrated directly into the Cyberduck software providing an easy to use and nicely integrated way of encrypting files and folders. This integration crucially allows Cyberduck to provide locally applied zero-knowledge encryption to virtually any cloud storage drive.
Privacy is also less of an issue given the software is free, open source and allows downloads without any personal information being given over to the developers.
Cyberduck Support
Being open source and free, Cyberduck naturally relies on a community based approach to providing support. If you do need special help then a ticket can be raised on the public support forum whihc is accessed via the Cyberduck support portal.
With this community support aside, Cyberduck have a very useful support wiki featuring a detailed knowledge base of the product.
Cyberduck Pricing
Cyberduck is 100% free and open source, this means it can be used personally and by business users completely free of charge.
You can optionally donate $10+ to remove the donation reminder messages found within the application (although personally I don’t find them too invasive).
Cyberduck Review Summary
Cyberduck provides a great way of accessing cloud storage from a desktop PC, the really useful part being that multiple cloud accounts can be bookmarked and switched between very easily. Whilst not the most sleek looking software it is very easy to use and understand and the bookmarks feature makes managing multiple cloud storage accounts easy.
It is also really good to see the Cryptomator integration which helps bring end-to-end encryption to virtually any cloud drive, as such this integration makes securing cloud files simple and easy.
All-in-all this software is a great way to manage multiple cloud accounts and to be able to use it for free just makes things even better, a great job Cyberduck!
Are you looking for help and advice on choosing the best backup software for your PC or Mac? If so then be sure to check out our guide to choosing backup software which also contains a list of our favorite choices as tested here on BestBackupReviews.com!

