Blobbackup Review
Features - 88%
Usability - 96%
Security - 94%
Support - 91%
Pricing - 95%
93%
Very Good
Blobbackup is an easy to use backup solution which makes the process of getting backed-up to the cloud very straightforward and, at just $9 / month, very cost effective!
Stating life recently as a very promising cloud-focused backup application, Blobbackup have continued to develop and refine their simple but effective software into what is now a leading backup solution which comes with cloud storage included right out of the (virtual) box!
Whilst some PC and Mac users will always prefer to choose their own cloud storage, for many people the simplicity of having such cloud storage included and pre-configured as a part of the software subscription fee will be a big positive. In-fact, with this latest release of Blobbackup, not only has a massive 2TB of cloud storage been included for just $9 / month, but the app itself has been streamlined and modernised to make both installation, configuration and backing-up as simple as possible!
I was really impressed with Blobbackup last time I tested it back in 2020, whilst it is undoubtedly a simple tool overall, I found it was also easy to use and very good at getting the basics right (and it is these basics which ultimately count when getting the best from any backup solution). Time to check out the latest version of Blobbackup for myself and see how well it performs – let’s go!
Are you looking for help and advice on choosing the best backup software for your PC or Mac? If so then be sure to check out our guide to choosing backup software which also contains a list of our favorite choices as tested here on BestBackupReviews.com!
Key Features
- Full Support for Windows & MacOS devices
- Massive 2TB of storage included
- Strong, zero knowledge AES 256-bit encryption
- Unlimited historic file versioning
- Very easy set-up and configuration
- Automatic backups on by default
- Includes external drives & NAS
- Open source desktop software
- Email based monitoring alerts
- No multi-factor (2FA) options available
- Only a single backup set supported
- 15 Day free trial available!
- Priced at a very competitive $9 / month
Blobbackup Usability
In this first section of my review I will be signing-up for and installing the Blobbackup software for myself, I will then be looking at the process of backing-up and restoring data before checking out any advanced settings which might be found within the application a little later on. This all begins at the official Blobbackup website where a 15 day free trial is available, best of all, this free trial doesn’t require any personal or payment details be provided upfront, great!
Sign-up & Installation
Getting started with Blobbackup begins at the official Blobbackup website, it is from here we can sign-up for a free 15 day trial with nothing more than a working email and a strong password.
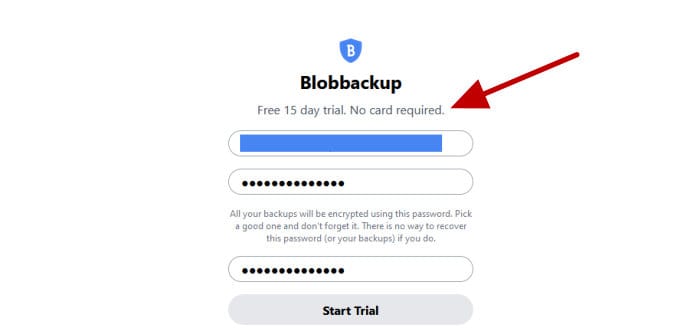
NB – When singing up to Blobbackup, be aware that the account password (entered whilst creating the account) also forms the encryption password used by the software to protect any backed-up data. With this in mind, be sure to create a strong and unique password when signing-up for the Blobbackup service!
Once signed-up to the service, one of the first things to do (via the user dashboard) is to downland the Blobbackup desktop software, in my case this download came in at just over 37MB and was running just a few moments later.
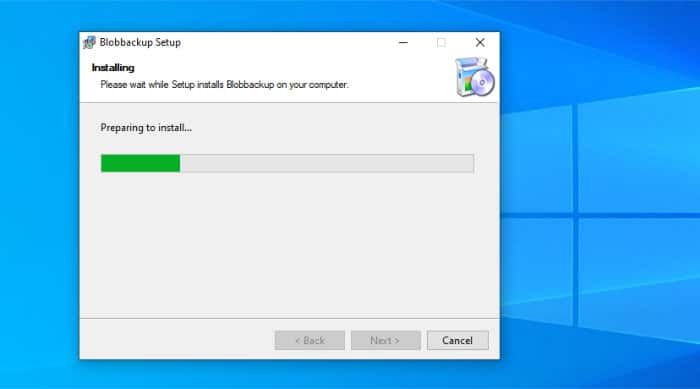
After just a few moments the installation of Blobbackup in my case was complete, one of the first things the desktop software will ask us to do is login to the service, this is done using the same email and password as was used when signing-up for the service earlier on. With sign-in complete, all that is then required is to click on “Start Backing Up” to reach the main app homepage and begin the process of protecting the device in use.
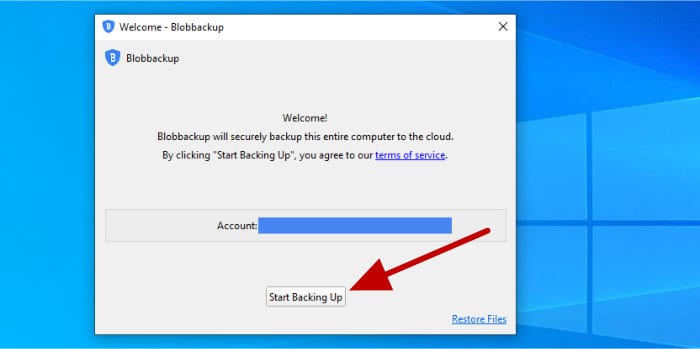
At this point we now have Blobbackup installed and ready to start backing-up our device, in the next section of this review I will be looking at this cloud backup process in a little more detail before moving on the restore process and app settings later on in the review.
Backing-up
In the previous section I looked at the sign-up and installation process for Blobbackup, this cumulated in the installation of the desktop software and the automatic starting of the initial backup of the device straight afterwards!
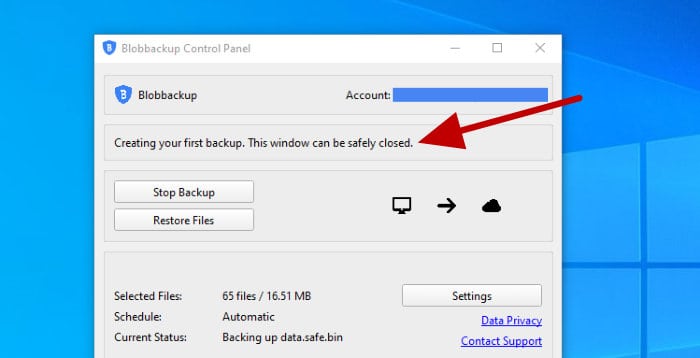
As can be seen in the screenshot above, as soon as we reach the main application homepage, we can see that the software is already configured for and running the initial backup of the device. By default, Blobbackup will automatically select our entire system drive (minus some sensible exclusions) for inclusion within the backup and run itself automatically (once per hour) thereafter on the automatic scheduling option.
NB – Remember, when using Blobbackup, all data is automatically encrypted using the main account password before it ever leaves the device which is been backed-up. This means we don’t need to worry about setting encryption options at any point during this process!
At this point, in many cases, it would be permissible to simply leave Blobbackup to run in the background and let it continue to protect files as and when they are changed. We do, however, have access to a small settings section where we can fine tune some of the app settings and also further refine what is backed-up and what is excluded from the main backup set.
NB – Blobbackup only provides support for a single backup set and only supports storing data upon their own cloud storage service (2TB of which is, of course, included with the subscription).
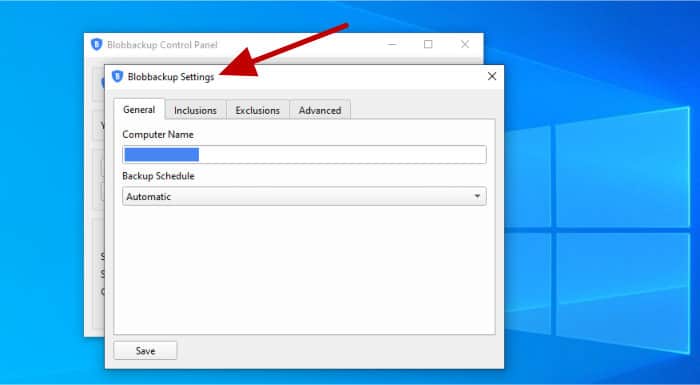
As can be seen above, when entering the settings window, the first two things we can change here are the device name (if necessary) as well as the option to run the backup manually or on the automatic scheduling option (which is the default option). The automatic scheduling option sees backups take place once per hour, unfortunately, we cannot alter this interval meaning if you do want a more frequent backup (say, every 15 minutes) then this is simply not possible as of time of writing within Blobbackup!
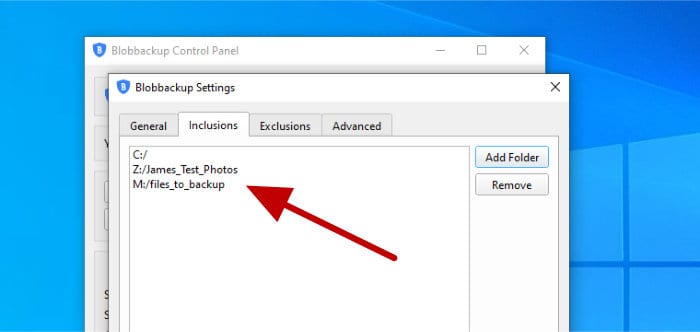
Moving on and the next two tabs concern the files which are included and excluded from within the backup set. As can be seen in the above screenshot, whilst we can specify specific regions of our device to be included (e.g. an external hard drive), Blobbackup will by default include everything on our default system drive (this will be everything on the “C” drive for the typical Windows user).
NB – Whilst including everything on the C drive within Windows is a good default approach, Blobbackup will not automatically pickup any additional, external or network drives which might be connected to the device, these must be added separately if and when required!
With this inclusions section system in mind, it means if we do have any external hard drives or network drives (e.g. from a NAS system) which need backing-up then we must be sure to add them into this inclusions section ourselves!
NB – Some cloud backup providers enforce limitations on backing up external hard drives and network drives, for example, insisting external drives be plugged-in at least once every 30days to remain a part of the backup. Thankfully, Blobbackup do not enforce such restrictions on external devices or network shares beyond the 2TB storage limit for the account as a whole, a great approach as far as I am concerned!
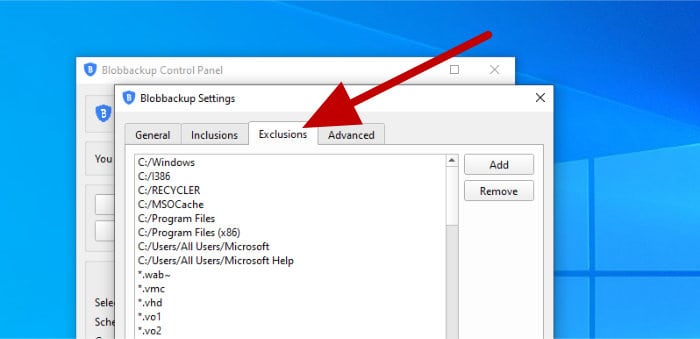
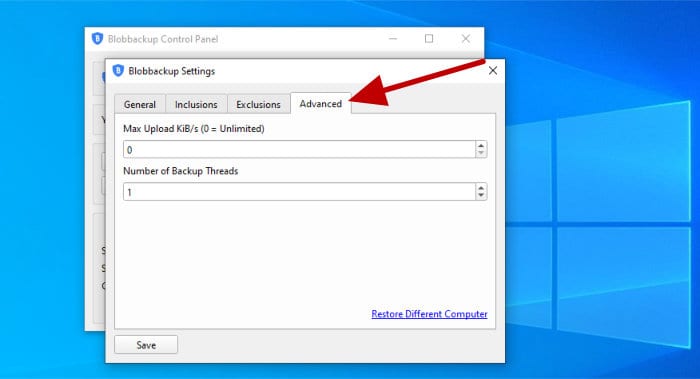
Moving on and the exclusions screen (seen above) works in much he same way as the inclusions screen, here we can specify any files and or folders to be excluded as well as specific file types to exclude thanks to the wildcard file name entries (e.g. “*.exe” will exclude all EXE files universally). Finally, under the advanced settings tab, we see just two additional options allowing us to set the number of backup threads and also limit the upload bandwidth in use when applicable to do so (both potentially useful for older PCs or for those with slow internet connections).
With any app settings adjusted, we can now simply leave the software to carry on backing-up our device automatically or click on the “Backup Now” button to manually start a backup at any time it is required. Progress of the current backup is always easy to check via the app homepage as is the current usage of the 2TB of cloud storage included with the account.
And with that we have covered backing-up within Blobbackup, a simplistic and straightforward approach but one which seems to cover the basics well and does everything it is expected to do. I would like to have seen more frequent scheduling options available given that 1 hour is still quite a long time in some respects, but this is otherwise a very streamlined process which helps to get a device backed-up safely and with the minimal of fuss!
Remember, if you want to try out Blobbackup for yourself, there is a full 15 day free trial of the service available via the official Blobbackup website (and no payment details are required upfront).
Restoring Files
Now we have a device fully backed-up by Blobbackup, we can start looking at the restore process, a process which begins in the Restore section of the desktop application and is accessible via the “Restore” button found there.
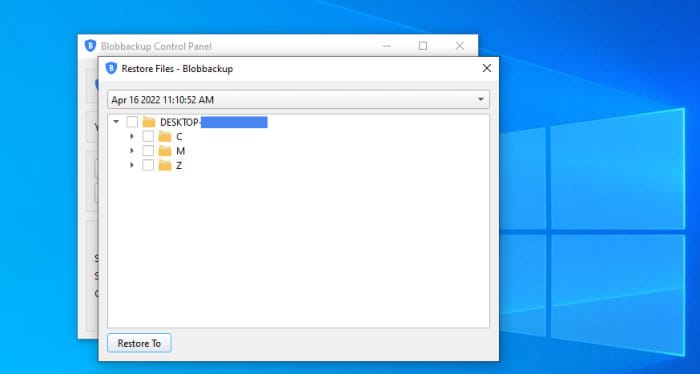
NB – We must re-enter our master password before accessing the restore page!
Once in the restore section of the app we see a file tree in the main part of the screen for selecting any files which are to be restored alongside a date picking drop-down box just above it. The date picking box is the first thing to focus on here as it will allow us to select the correct version of any backed-up files to be recovered before going on the selecting the files themselves.
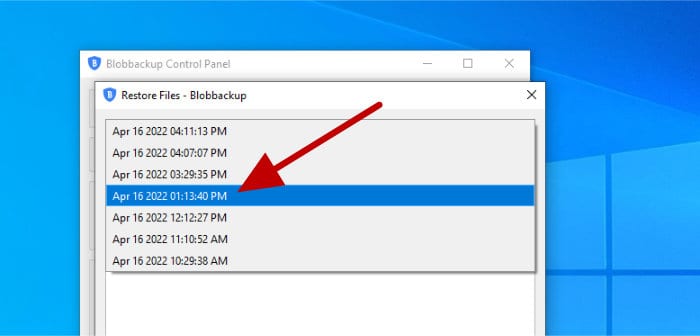
Blobbackup generously offer all of their customers unlimited historic file versioning (within the 2TB cloud storage quota) as a part of the standard subscription fee, this means whenever a file is altered (or even deleted) its previous state can still be accessible and recovered from, potentially even years after any changes were made!
NB – Having access to previous versions of files can be one of the best forms of protection against ransomware and malware! Click here to read our full article explaining how backup software, such as Blobbackup in this case, can help you boost your own device’s protection against malware!
With the correct version (date) of the restored files selected, the next step in resorting data is the selecting of the one or more files to be recovered, this is done via the file picking box in the middle of the restore screen (this can be seen below).
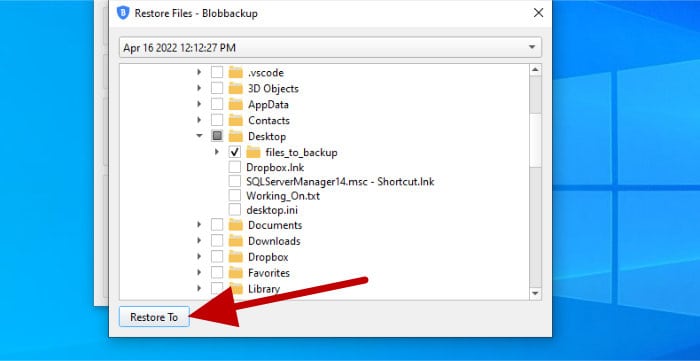
With the correct files now selected, the next step is selecting the restore location via the “Restore to” button seen towards the bottom left of the screen. When using Blobbackup we must pick the restore location for each and every restore operation as there are no shortcuts here, for example, electing to restore files to their original location as might be found within some other backup software solutions.
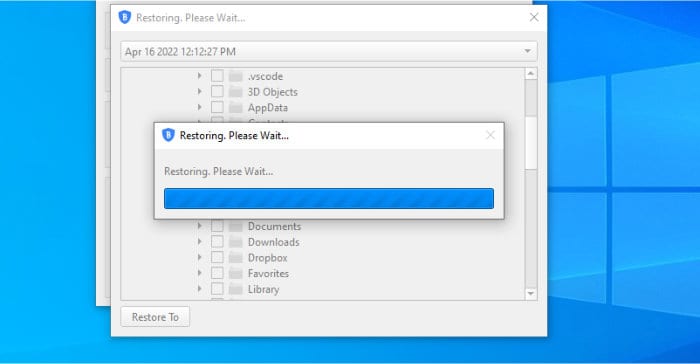
Once all files to be restored have been selected, plus the restore location, the process of restoring data itself can begin. Remember, Blobbackup is 100% cloud based backup software, as such the time taken here can be dependant upon several factors including your own internet download speeds, in my particular case the restore appeared to work quickly and the recovered files were available just a few moments later!
And with this the restore process within Blobbackup has been covered! Whilst this process does work well overall, it needs to be pointed out that it also require that the desktop software be installed for a restore to take place at all (there are no web-based restores). Additionally, Blobbackup do not feature any other restore options such as the restore been mailed on a physical external hard drive as might be fund with some other cloud backup providers (usually at an additional cost, but potentially very useful when wanting to perform a large restore).
Blobbackup Security
One of the most effective methods for protecting any backed-up data is via the application of strong encryption which is applied directly to any files before they leave the device being backed-up. Thankfully, Blobbackup makes good use of this particular approach and applies strong 256-bit encryption to all files being backed-up before they leave the device by default!
Not only do Blobbackup apply strong encryption to al files backed-up by default, they have managed to automate and integrate this encryption process into the core of the service itself, this means only a single username and password is required (at sign-up time) which will then be used to ensure all data within the backup service is automatically secured at all times. This is a great approach to providing backup security and helps ensure that customer data is always secure by default!
NB – More information on the security and encryption process being used by Blobbackup can be found via the official Blobbackup knowledge base.
Blobbackup Support
Blobbackup provide a dedicated support portal from which customers can access a good selection of documentation and product guides in order to help make best use of the service. Additional support can be obtained via the official support email address ([email protected]) as well as via the Blobbackup social media pages on Github and Reddit.
Blobbackup Pricing
Blobbackup is priced at a simple $9 per month, per device and includes up to 2TB of cloud storage per subscription. Best of all, this 2TB can be used across the device itself plus any external hard drives and network shares (e.g. from NAS drives) without any additional limitations beyond the 2TB account storage limit imposed!
More information on pricing plus a full 15 day free trial of the service can be found at the official Blobbackup website.
Blobbackup FAQ
No, Blobbackup is a premium cloud backup solution priced at $9 per month, per device. A 15 day free trial is available via the official Blobbackup website for anyone wanting to test the service out for themselves prior to purchase.
Blobbackup makes use of strong, zero knowledge 256-bit encryption which is turned on by default for all backup activity. More information on how Blobbackup make use of such encryption can be found via their knowledge base article on end to end encryption.
Yes, external hard drives can be backed-up using the Blobbackup service in the same way as any other storage which is accessible on a device. Also, it is important to note that there are no additional restrictions on backing-up external hard drives other than the universal cloud storage limit of 2TB which applies to the account as a whole.
Yes, backing up of shared / network drives is possible within Blobbackup providing the main cloud storage limitation of 2TB is kept within across the entire account.
Blobbackup Alternatives
In this section I will be looking at some alternatives to the Blobbackup service, this will be focused on cloud based backup solutions with generous storage allowances and a clear focus on simplicity and ease of use for a low monthly or annual subscription fee.
1) Backblaze
Backblaze is now well known as being a leading cloud backup solution, one which offers unlimited cloud storage plus an easy to use and highly automated piece of desktop software for both Windows and MacOS devices alike!
One of the most notable features of Backblaze is how quick and easy it is to get installed and start backing up a device to an unlimited supply of secure cloud storage. A self-configuring installer can be downloaded from a customers Backblaze account which makes the initial set-up process almost fully automatic. After installation is complete, all important data is then selected automatically by the software, backed-up to the cloud and (importantly) encrypted with AES-256bit encryption before being transmitted by default.
With ease of use aside, Backblaze is a solid cloud backup choice thanks to the provision of unlimited cloud storage, unlimited historic file revisions (for additional cost), easy web-based restore functionality and the option to save money on 1-year and 2-year longer term subscriptions when applicable.
Backblaze is priced from $7 per month, per device with the option to save money by taking out a 1 year subscription priced at $70 / year or a 2 year subscription priced at $130. Backblaze also offer a full 15 free trial of the service via the official Backblaze website.

- Simple setup
- Unlimited cloud storage
- AES 256-bit encryption
- 15-Day free trial
- From $7 / month!
2) Crashplan
Featuring unlimited cloud storage and unlimited historic file versions for a simple $10 per month, per device, Crashplan for small Business is a seriously good, cloud-focused backup solution!
Despite being named “Crashplan for Small Business”, Crashplan is available to both small business and personal (individual) customers alike, it is also widely available thanks to the inclusion of desktop software available for Windows, MacOS and Linux devices alike.
Whilst arguably not quite as simple to set-up as Backblaze (mentioned above), what really makes Crashplan stand out is the inclusion of unlimited cloud storage, unlimited historic file versioning, strong AES-256 encryption (which is enabled by default) plus the ability to include numerous external hard drives in the backup without any limiting restrictions attached (e.g. not having to re-attach the external drive at least once every 30 days for it to remain backed-up as is the case with Backblaze).
Overall, Crashplan is a serious cloud backup solution, especially for business and professional users who need a straightforward and truly unlimited cloud backup solution which covers all of their devices and external hard drives for a simple, low cost of just $10 per month (per device).
A 30 day free trial of the Crashplan for small business service is available via the official Crashplan website!

- Real-time backups
- Unlimited cloud
- AES 256-bit encryption
- 30-Day free trial
- From $10 / month!
3) Carbonite Safe
Carbonite is a very popular cloud backup solution, one with a focus on making cloud backup both simple, cost effective and accessible to all form a very competitive $7 per month (per device)!
One of the most notable elements of Carbonite, unlimited cloud storage aside, is how easy it is to install and how simple the initial configuration process is. This makes Carbonite a fuss free method for both Windows and MacOS users to get their valuable data backed-up and safely stored in the cloud.
Other features including “status dots” for easily determining the level of protection for any given files and folders, strong file encryption plus the ability to automatically backup external hard drives and video files (on higher level plans) all contribute to making Carbonite a good, easy to use and value focused cloud backup solution.
The basic Carbonite plan with unlimited cloud storage is priced at just $7 per month, per device (paid annually at $83.99). An upgraded plan bringing with it the ability to include an external hard drive and automatic video file backups is also available for $119.99 per year. Other plans plus a 15 day free trial are available via the official Carbonite website.

- Easy to use
- Unlimited cloud
- Real-time backup
- 15-Day free trial
- From $6 / month!
Blobbackup Review Summary
Whilst on the one hand it is fair to say that Blobbackup is very basic and simplistic in its approach, it must also be stressed, in turn, that this is a service which covers all of the backup basics to a very high standard and makes the process of getting backed-up to the cloud easy and straightforward!
I particularly like that unlimited historic file versioning and strong AES 256-bit encryption are both not only turned on by default within Blobbackup, but also intrinsically integrated into how the service operates (in other words, there is no need to worry about enabling or configuring such important services, as they are always on by default). I also like how easy it is to get the software installed, that all important data is selected by default and that the automatic backup scheduling does a good job of then making this a truly “set and forget” backup service as soon as installation is complete!
Having said all of this, I still think there a few small areas in which Blobbackup could be made even better, for example, the ability to make use of backup sets could be very beneficial to certain users (e.g. for backing-up large files only during quiet hours) as well as the ability to take automatic backups more frequently than the current (fixed) setting of just once per hour (increasing this to at least once every 15 minutes would be much better in my opinion).
Overall, I am really impressed with this latest version of Blobbackup and the solid cloud storage service which now sits behind it, not only does everything seem to work very well but at just $9 per month this really is a great service at a very competitive price – great work Blobbackup!
Are you looking for help and advice on choosing the best backup software for your PC or Mac? If so then be sure to check out our guide to choosing backup software which also contains a list of our favorite choices as tested here on BestBackupReviews.com!

